

Saturday, December 31, 2011
Friday, December 23, 2011
Happy Christmas!
We didn't put up a real Christmas tree this year,
as we're spending the holiday with
The Girl Child and her family in California!
(70 degrees & sunshine is the weather report for today!)
I'm missing our tree though...
I found myself looking through some of last year's photos:

Most of our ornaments are decades old.
I love the oddball subjects....
a lamp!
Now who would think of a lamp for a Christmas tree?!

Or a head?!
We have a few heads hanging around the tree.
They always creeped our daughter out
--she would never hang them herself!

I love this guy!
Part Santa?
Part Wizard?!

Or a beautiful peacock sitting on a ball.
(Don't particularly know why he's doing that;
he just is!)

And if you want something really weird....
Get a look at this one!
We call him
"The Fetal Puppy"
(I know, gross!)

He's so weird, he's worth another look!
Oh my!

This is actually a fairly new one.
A pincushion!
Every crafty seamstress needs a pincushion
on her Christmas tree!

And then there's just the downright pretty ones
that have been with me my entire life.
When I get them out of the box,
I feel so at home, surrounded by comforting familiarity.


May your Christmas be one of beauty, love, & peace.
Wherever you are!

Let there be Peace on Earth.
Tuesday, December 20, 2011
Holiday Hand Towels
If you've got a hand towel...

and some leftover Christmas material....

you can make a simple, decorative towel for your guest bath or a hostess gift or a stocking stuffer. (Why is it when I type this, I hear this uber-perky voice in my head, getting all excited about.... a towel?! Such is my life!)

Using the lines that are already in the towel's design as your guide, just line up the material, tucking all the rough edges under, and stitch along both sides and the ends. I didn't even bother basting or anything like that; it just depends how free-wheeling you feel and your sewing experience. (Make sure your bobbin color is the same as your towel, regardless of what the top color is.)

I had enough material to make two of them! And, really, it didn't take that long.

The material is a remnant from my daughter's Christmas stocking that I made for her when she was about 5 years old. She'll probably freak when I give her her towel, thinking I disassembled her beloved stocking! (I like to keep her on her toes!)
Now to go through that bag o' scraps I have.... surely there's some "hearts" print in their somewhere for Valentine's Day? Or some bunnies for Easter? Or... or....!
Sunday, December 18, 2011
And 3 not-so-tiny Reindeer...
I fell victim to holiday marketing this year, thanks to those cunning folks at the Barn that is full of most everything except Pottery. Usually I manage to take only an occasional peak at their stuff, primarily just for a little look-see; it seldom gets beyond the drooling stage. Until this year, that is.
It was one of their ever-changing, Christmas "One Day Sales" they've been pushing for many, many days now--I have an overstuffed in-box to prove it. I'll grant them this--they are savvy! I can't decide if I was truly enchanted by their product or if they just wore me down. (I know for sure they couldn't care less which one it was--the end result is what matters, right? Ka-ching!)
This is what I fell for:

Aren't they sweet? Aren't you just enchanted?
Firstly, I pictured these guys as being somewhat more diminutive. And secondly, they should have come with a warning about sharp edges! Geesh--it was dangerous pulling these skinny bad boys out of their boxes and untangling their "antlers."
Once I finally got them out of their boxes, I couldn't decide what to do with them. They look different in person and not quite so enchanting-- but I think that's more a lack of imagination on my part than on theirs! Frankly, they look like some metal-work sculpture I would have seen at a Mexican bazaar. Now don't get me wrong, I love Mexican bazaars! It's just that if they had indeed come from a Mexican bazaar, they would have cost a whole lot less! (Apparently they come from a Chinese bazaar--the "made in" sticker indicated as much. How exotic.)
So they sat under a table in the livingroom for about a week. Mr. P walked by one day and asked where they came from. I told him not to ask.
I walked past them, too, wondering just what I was going to do with them!
They needed something...but what?
Ribbons? Colorful ribbons? There's 3 of them...what is Christmasy and comes in 3's?
How about J-O-Y?
Round 1 with the Graphics Fairy, I downloaded some of her Christmas sheet music ("The Christmas Tree") and made a star cut-out. Working with 3 of the same cut-outs, I added red letters. Though you wouldn't know it, all 3 of the starts are the same size in my computer file, I just printed them out in proportionate sizes to match the deer.

At this point, perhaps I should have punched holes in the tops, put a ribbon through them and called it a day? (As in, sometimes less is more?!)
But no.....I wanted some bling.
Round 2 with glitter glue:

I had a bottle of red glitter-glue. Well, as you can see above, glitter-glue isn't quite as snazzy as regular old hard-working glitter, nor does it go on evenly. Grrrr!

So I added multi-colored regular old glitter (didn't have any red). Oh Joy, so nice and sparkly!
And the final result?

Having made their way to the top of the table, here they stand, paused, not sure what to do next.
Find some fake snow perhaps?!
In retrospect, I think I should have given the tags a white background to make it pop out a bit more; but that's getting a little fussy. They'll do for now. I'll figure something out....any ideas?!
The moon on the breast of the new-fallen snow, Gave the lustre of midday to objects below, When, what to my wondering eyes should appear, But a miniature sleigh, and eight tiny reindeer.
- Clement Moore,The Night Before Christmas.
Saturday, December 10, 2011
More Christmas Glow
A couple weeks ago I made some Christmas candles, using little more than a dollar-store candle. (If you're curious you can see it here, or you can probably just keep scrolling down....) This week I finished up another simple one, using this graphic from, where else?!, the Graphics Fairy:
Along the bottom, in matching green, I added the inscription:
I think it sounds quaint and, well...joyful!
After sizing my image to only be as tall as the wax (leaving the top part clear), I printed it out onto Decal Paper, etc. etc. etc. Here's the result!

The bow is just twine, combined with a couple jingle bells I found lying in a box of Christmas sequins, glitter & doo-dads; along with two leaves that fell off some "holly" holiday lights we bought this year (literally found them on the floor and thought, "these might work!"). See how well thought-out this whole process is? ha!
And here's the backside:

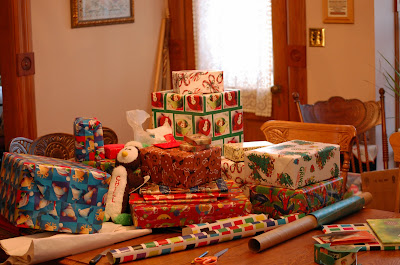
And now, dear readers, if you are still with me....I have to come clean. This is what my dining room table has looked like the past couple days. Aaaaarrrggghhh! This is pretty much what it looks like right now, as I am typing this. I have just received news that we are having guests dropping in for lunch tomorrow. You know, lunch--where you sit around the table.... Yikes!
Update: Never let it be said that I can't rally when called upon!


 |
| The Graphics Fairy has other designs that sort of match this. I may have to make a set! (That's where the madness starts.....) |
Joy to You at Christmas
I think it sounds quaint and, well...joyful!
After sizing my image to only be as tall as the wax (leaving the top part clear), I printed it out onto Decal Paper, etc. etc. etc. Here's the result!

And here's the backside:

My quasi-lame attempt at "staging" has given the photo a sort of golden glow. The colors are actually a little more vibrant. I'll just call that soft light!

.........................................................................
Update: Never let it be said that I can't rally when called upon!

xoxoxoxox
Have never joined anything like this, but thought it looked fun.
Wow, there's a whole lotta creative folks out there!
Tuesday, December 6, 2011
The Loveliness of Snow (When Not Scooping It)
We had our first snow of the season this week!

It was a soft snow.

I was enchanted.


I was not scooping it!
Monday, December 5, 2011
Milk Can Christmas
Last time I posted, I showed you this:

And I claimed that I had some big plans for it...oh yes, indeed!
It is with a sigh of relief that I can post an update on my progress.
Here it is in stages:
1) This is really an ugly, old milk can.

I cannot even remember where it came from. I'm thinking maybe it was in an old garage in our backyard when we bought our house. (The garage was a remnant of an old, 3 story barn that sat upon the hillside behind our home, long before our arrival upon the scene. We're told it had entrances on 2 levels. Sadly, that garage met its demise the day one of its stone walls collapsed--the result of an overly industrious groundhog undermining its foundation. That also happened to be the very same day my cat nearly died in surgery and our daughter broke her arm rollerskating! Ever have one of those days?!)
Good grief, I digress! Where was I? The milk can-- it is terribly dented, and horribly rusted; it has been painted over several times. The bottom is rusted and distended to the point where it will not stand flat anymore. (You, nor anyone else, will not be seeing that!) I cannot imagine what makes an old milk can bulge like that? Perhaps water froze and expanded inside there?
2) The milk can needed a paint job!

Christmas red was in order. (Please forgive the photo quality--quickly taken with my phone.) It's amazing how many flaws a good can of spray paint can cover! Remember, I'm not talking sophisticated restoration here--we're just skirting along by the skin of our teeth.... (Is that not one of the weirdest sayings ever?!)
It looks like I forgot a part, doesn't it?!

3) When you use decal paper, it will not transfer onto a dark background. I have no idea why exactly; I just go with it (and it wasn't a suitable project for a modpodge transfer, in my opinion). Therefore, I had to paint a white background the same size as the design I was planning to affix.

Here it is with a white rectangle suspiciously the approximate size of an 8 1/2" x 11" piece of paper.
4) I downloaded this antique postcard from the Graphics Fairy. (I'm developing a serious girlfriend crush on this woman--her site is so amazingly fun to delve into!)
With my computer, I enlarged it to fit onto a sheet of decal paper (8 1/2" x 11" standard size).
5) Miraculously (from my point of view) it fit into the white space provided! And because the decal is initially pliable after you remove the paper backing (and before it dries), I could adjust and straighten it, while also making it adhere nicely to what is definitely an uneven surface. I'd like to be able to show you a photo of this phase, but it's kind of intense-hands-on for that brief period; and I was alone. Nobody to man the camera....

So far, so good!
6) Let's put it outside, where it belongs!
The greenery is actually some of those mini LED lighted stalks, made to look natural (well, as natural as lighted up plants would look, I suppose).

Here's the final version of how the front porch now looks.

Thanks for looking!
P.S. That's not my cat!

And I claimed that I had some big plans for it...oh yes, indeed!
It is with a sigh of relief that I can post an update on my progress.
Here it is in stages:
1) This is really an ugly, old milk can.
I cannot even remember where it came from. I'm thinking maybe it was in an old garage in our backyard when we bought our house. (The garage was a remnant of an old, 3 story barn that sat upon the hillside behind our home, long before our arrival upon the scene. We're told it had entrances on 2 levels. Sadly, that garage met its demise the day one of its stone walls collapsed--the result of an overly industrious groundhog undermining its foundation. That also happened to be the very same day my cat nearly died in surgery and our daughter broke her arm rollerskating! Ever have one of those days?!)
Good grief, I digress! Where was I? The milk can-- it is terribly dented, and horribly rusted; it has been painted over several times. The bottom is rusted and distended to the point where it will not stand flat anymore. (You, nor anyone else, will not be seeing that!) I cannot imagine what makes an old milk can bulge like that? Perhaps water froze and expanded inside there?
2) The milk can needed a paint job!

Christmas red was in order. (Please forgive the photo quality--quickly taken with my phone.) It's amazing how many flaws a good can of spray paint can cover! Remember, I'm not talking sophisticated restoration here--we're just skirting along by the skin of our teeth.... (Is that not one of the weirdest sayings ever?!)
It looks like I forgot a part, doesn't it?!

3) When you use decal paper, it will not transfer onto a dark background. I have no idea why exactly; I just go with it (and it wasn't a suitable project for a modpodge transfer, in my opinion). Therefore, I had to paint a white background the same size as the design I was planning to affix.

Here it is with a white rectangle suspiciously the approximate size of an 8 1/2" x 11" piece of paper.
4) I downloaded this antique postcard from the Graphics Fairy. (I'm developing a serious girlfriend crush on this woman--her site is so amazingly fun to delve into!)
 |
| This scene reminds me of Mr. P and myself with our daughter when she was little. Yep, we looked just like that! |
5) Miraculously (from my point of view) it fit into the white space provided! And because the decal is initially pliable after you remove the paper backing (and before it dries), I could adjust and straighten it, while also making it adhere nicely to what is definitely an uneven surface. I'd like to be able to show you a photo of this phase, but it's kind of intense-hands-on for that brief period; and I was alone. Nobody to man the camera....

So far, so good!
6) Let's put it outside, where it belongs!
 |
| It was actually snowing when I snapped the picture! |
The greenery is actually some of those mini LED lighted stalks, made to look natural (well, as natural as lighted up plants would look, I suppose).

Here's the final version of how the front porch now looks.

Thanks for looking!
P.S. That's not my cat!
Monday, November 28, 2011
Candles & Light
Combine a cheapo candle and some inspiration from a dangerous domestic anarchist (you can see her blog here!),
then add a sprinkling of fairy dust from The Graphics Fairy...
and what do you have?

This! As I mentioned in the caption above, this is comprised of 2 layered images. The postcard cutout was originally round, but I stretched it out a bit because I thought it suited the design better. Not sure it would have made any difference really. I also tried to get the song title at the top so that when the candle is lit, presumably, it would show. The images were printed out on decal paper and then affixed onto the votive. (Note to self: when using decal paper, you don't have to reverse the image! Duh!)
Here it is, all dressed up in its native habitat:
But wait, there's more! I couldn't limit myself to only 2 images:
This was a plain, glass candle holder--the kind where you're supposed to fill it with water and put flowers & stuff in the bottom and float a candle on top (I think). The back layer on this one is an antique advertisement for Christmas toys from a toy store in Boston. Overlaid on the ad is a cutout of Santa from a postcard (both images also from GF).
I just couldn't seem to get the photography right, but I kept trying! Here's a sampling to show you all sides:

I still have a few more images dancing around in my head...mixing with some glitter & ribbons & holly & such. Oh yes, there will be more to come--my kitchen table will not be seeing daylight for perhaps a week or more! However, this one's next in line:
And if you're still with me at this point, thanks for indulging me! Really.
 |
| Cheapo candle -- a contrast study. |
 |
| Combination of 2 images: "The Christmas Tree" sheet music & an antique postcard cutout. |
and what do you have?

This! As I mentioned in the caption above, this is comprised of 2 layered images. The postcard cutout was originally round, but I stretched it out a bit because I thought it suited the design better. Not sure it would have made any difference really. I also tried to get the song title at the top so that when the candle is lit, presumably, it would show. The images were printed out on decal paper and then affixed onto the votive. (Note to self: when using decal paper, you don't have to reverse the image! Duh!)
Here it is, all dressed up in its native habitat:
 |
| That's a twine bow & a sprig of "holly" around the top. |
 |
| I added this one because I thought it was funny... can you see me?! (Humor me a bit...) |
 |
| Add caption |
I just couldn't seem to get the photography right, but I kept trying! Here's a sampling to show you all sides:
 |
| Left side. |
 |
| Right side. |
 |
| I wanted to show it lit up, so I went to the windowless downstairs half-bath. |
 |
| One more time... |

 |
| Spooky Santa!? |
 |
| Help?! |
And if you're still with me at this point, thanks for indulging me! Really.
Subscribe to:
Posts (Atom)


